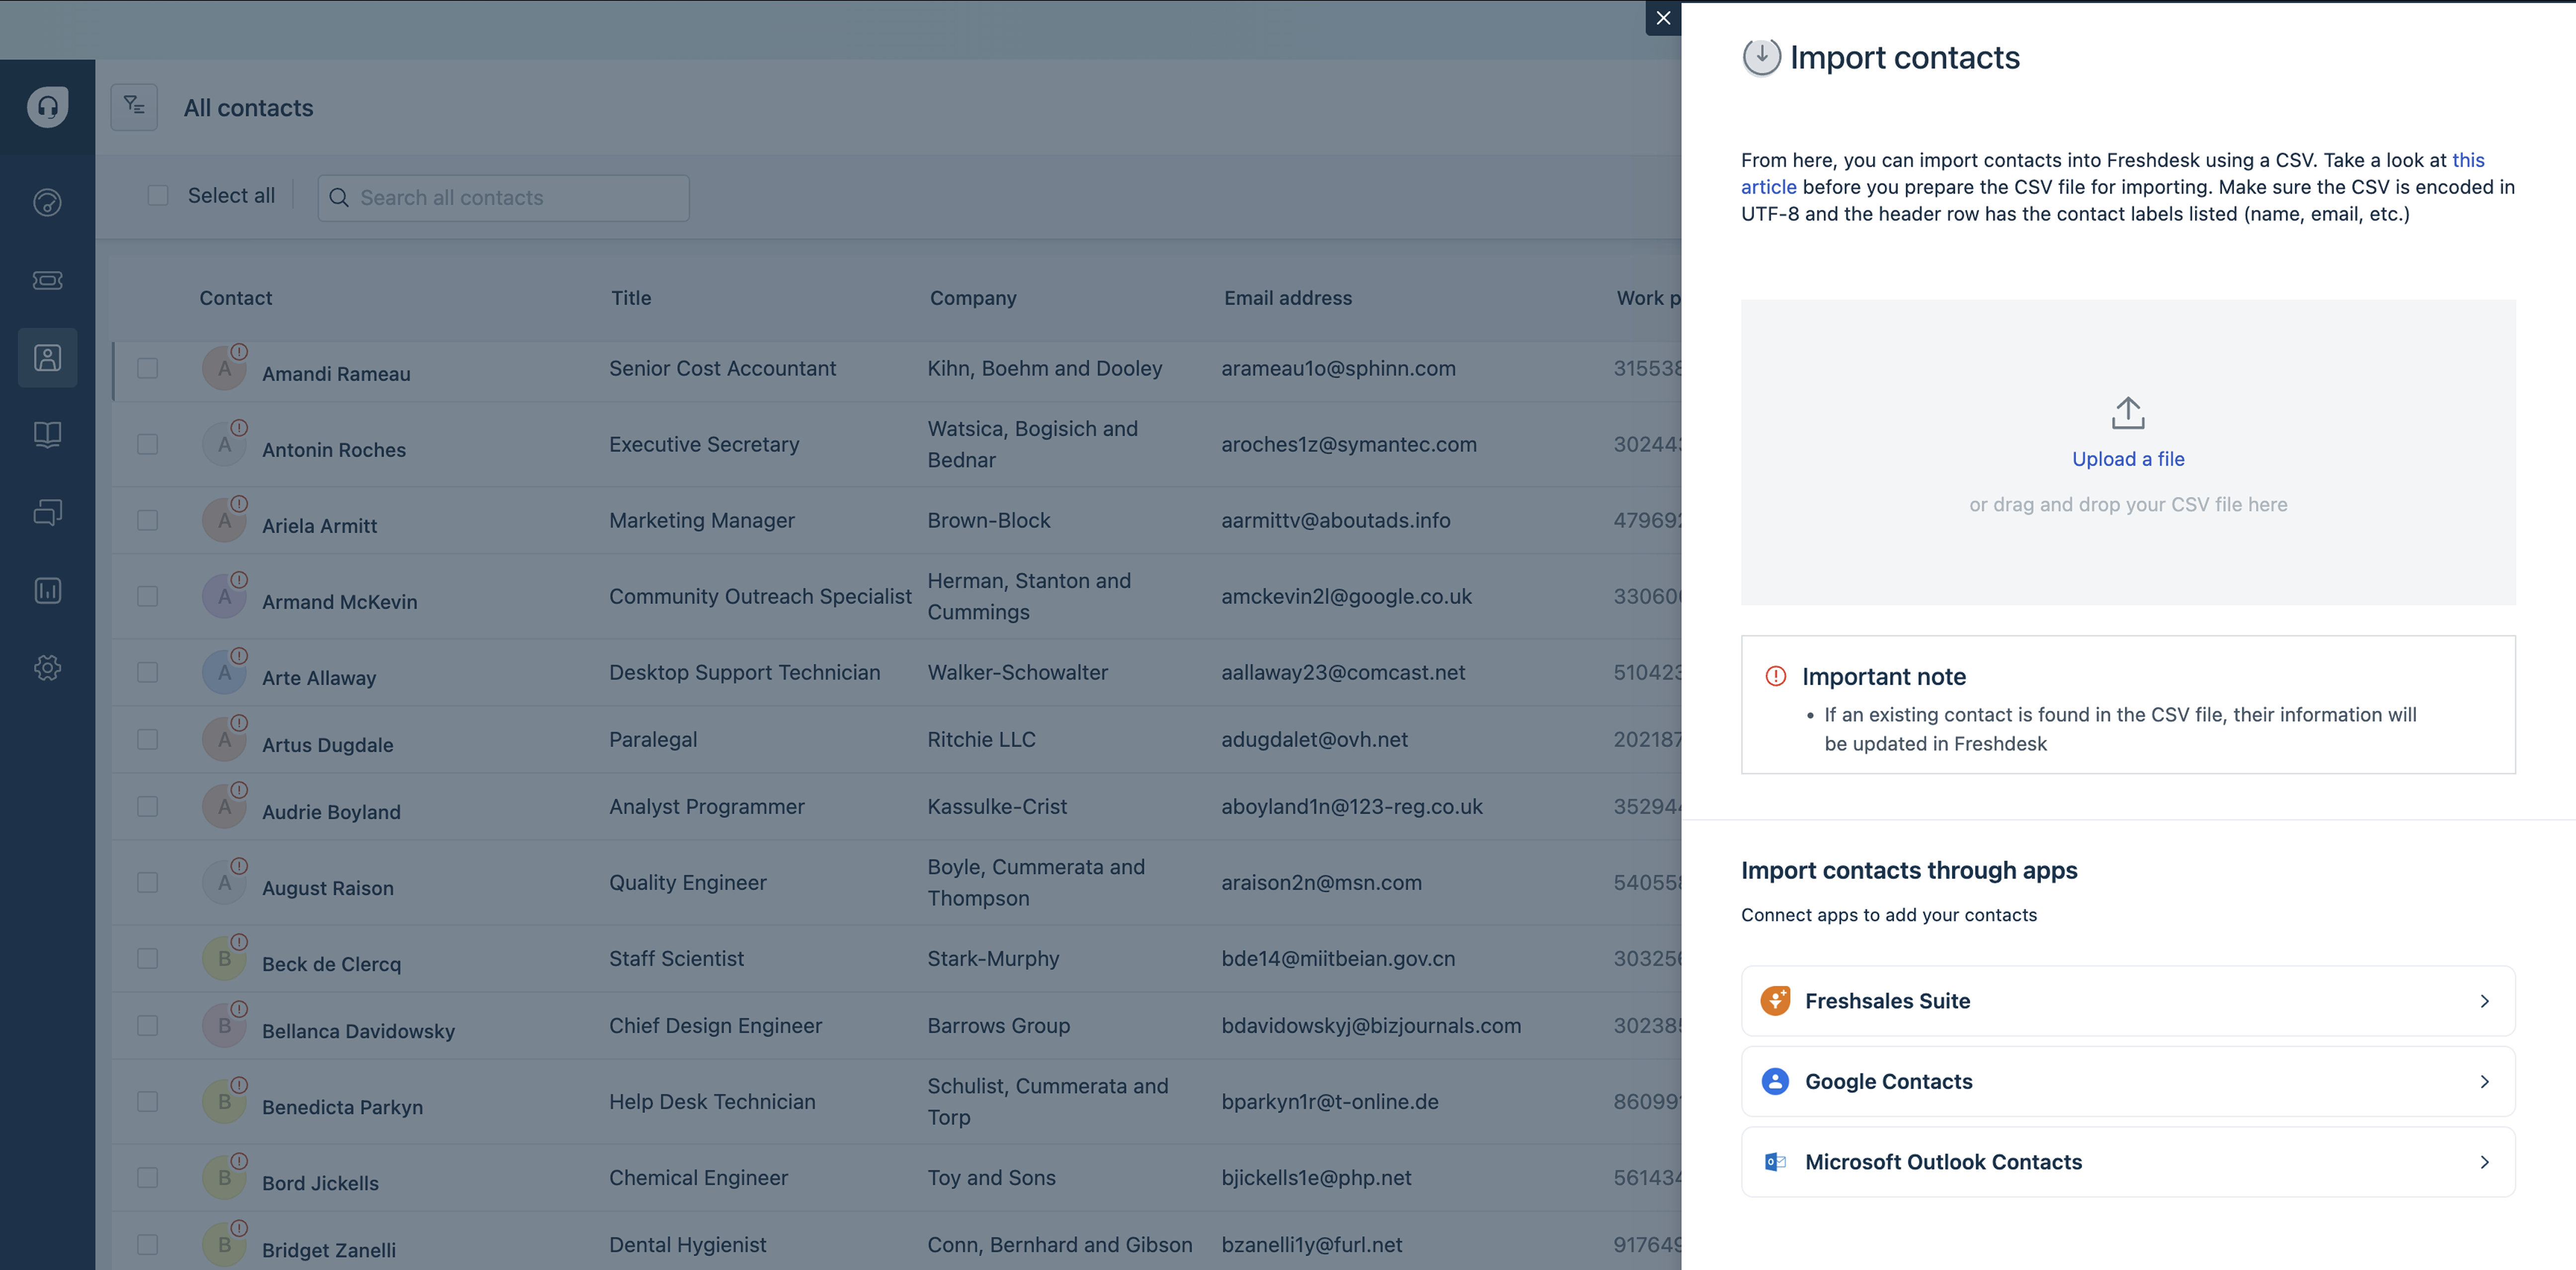
If you have a list of contacts that you'd like to add to your Freshdesk account, you can easily do so by following these simple steps:
- Prepare the Contact Data: Before you begin the import process, make sure to organize your contact data in a supported file format such as CSV (Comma-Separated Values) or Excel. Ensure that the file contains all the necessary contact details like name, email address, phone number, and any other relevant information.
- Log in to your Freshdesk account as an administrator.
- Navigate to Contacts: In the left sidebar, click on "Contacts"
- Once you are in the Contacts section, look for the Import button. Click on it to initiate the import process.

- Upload the Contact File: In the import window, click "Upload a file" (or) "drag and drop your CSV file here" button to select the CSV or Excel file containing the contact data on your computer.

- Map the Fields: Freshdesk will prompt you to map the fields from the import file to the corresponding contact fields in Freshdesk. This step ensures that the data is imported accurately. Match the columns in your file with the appropriate fields in Freshdesk (e.g., name column with name field, email column with email field).
- Review and Validate: After mapping the fields, review the data to ensure everything is correctly aligned. Check for any missing on mapping.
- Import the Contacts: Once you are satisfied with the data mapping and review, proceed to import the contacts. Click on the "Import" button to begin the process.
- Monitor the Progress: The import process may take some time depending on the number of contacts being imported.
- Import Confirmation: Once the import is complete, you will receive a confirmation message indicating the total number of contacts successfully imported.
Note: If an existing contact is found in the CSV file, their information will be updated in Freshdesk.
For any errors while importing, please share the screenshot with us to troubleshoot further.
